How to Create a Multipurpose Room: 4 Tips for Planning, Creating, and Decorating a Bonus Room
INSIDE: Learn how to make a multipurpose room, how to maximize space and functionality in a bonus room, and tips for organization.
After sharing this bonus room before and after post from our old home, we received several emails asking about its functionality— how we used it, how we planned it, and about bonus or “flex” rooms in general. To be honest, this was a big part of why we took so long to renovate this room — we were overwhelmed by possibilities and didn’t know what to do.
But really, this was for the best. Had we renovated the room when we moved in, we would’ve spent money without knowing what we really needed it for. We had no kids, few guests, and plenty of space for the two of us downstairs.
As the years marched on and our family grew, so did our need for space.
The twins needed a playroom, our becoming a foster family took over my home office, and we no longer had a place for guests to stay when they visited. Which leads me to my first tip:
1.) Assess your family’s current (AND FUTURE) needs.
One of the most important qualities in a home for our family is functionality.
”How can this space be the most useful now?”
”Do we anticipate something happening in the future that change the use of this space?”
When we first bought our home, the most functional (although not beautiful) use for our bonus room was for storage. It was the perfect catch-all room for, “out of sight, out of mind”— especially when it came to unpacked boxes when we first moved in. There was no sense in revamping a space that we never spent time in, so we closed the door on it and only went upstairs when we had to.
However, we knew that kids would be in the picture one day, and that it’d be the perfect playroom.
We didn’t anticipate quite as many kids so quickly, to be honest— but, alas… things change!
When we became a foster family and turned the third downstairs bedroom into a nursery, away went my home office and our guest room. So, we quickly found ourselves with had 3 needs:
Playroom for the kids
Office space for me
Sleeping area for guests
It’s important to asses future needs— even if they’re a few years off— because you don’t want to spend time and energy creating something that will have to be “undone” when the time comes. We chose to do mostly cosmetic updates and not spend money on large items that couldn’t be multifunctional in the future.
2.) Consider your budget - THEN PRIORITIZE
Do we have the funds/energy to do this all at once?
If not, could we do this in stages?
Can we do the work ourselves, or will we need to bring in a contractor?
In our case, there was no way that we could’ve done everything at once. We had kids running around, full-time jobs, and we were barely sleeping. So, prioritized. What did we need right away? What could wait? Could we do this ourselves, or were there some things that we could hire out? We decided to move forward with things that were the easiest and cheapest first, and then move on from there:
Clean everything out (easy + free)
Paint the walls (easy + minimal cost)
Replace the floor (more time consuming + a bit more expensive)
Switch out doors (annoying + not cheap)
Revamp the bathroom (time consuming, difficult, + most expensive)
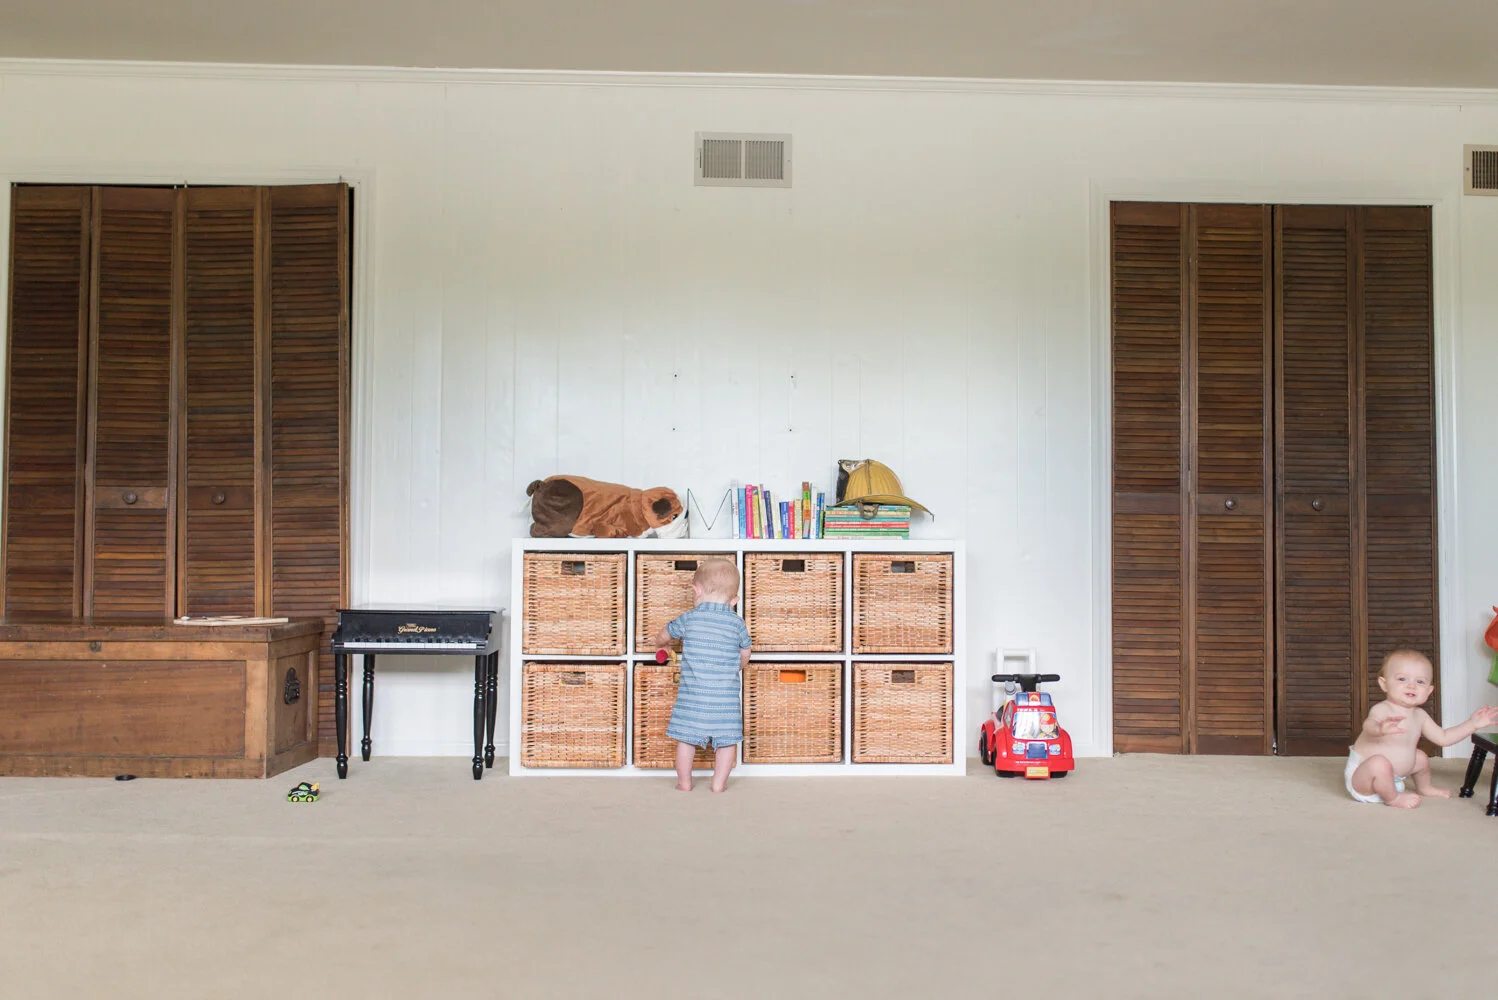
It’s important to remember that this was NOT done all at once. It was done in stages, over the course of 2 about years. You can see in the photo below that we were rocking some pretty grody carpet and old louvered doors for a while! We did what we could to make the room clean and functional, and then finished the bathroom when we had the time and money.
3.) Think spatially
What’s the main purpose of this room?
Are there nooks that can be used in creative ways?
Does the space look choppy?
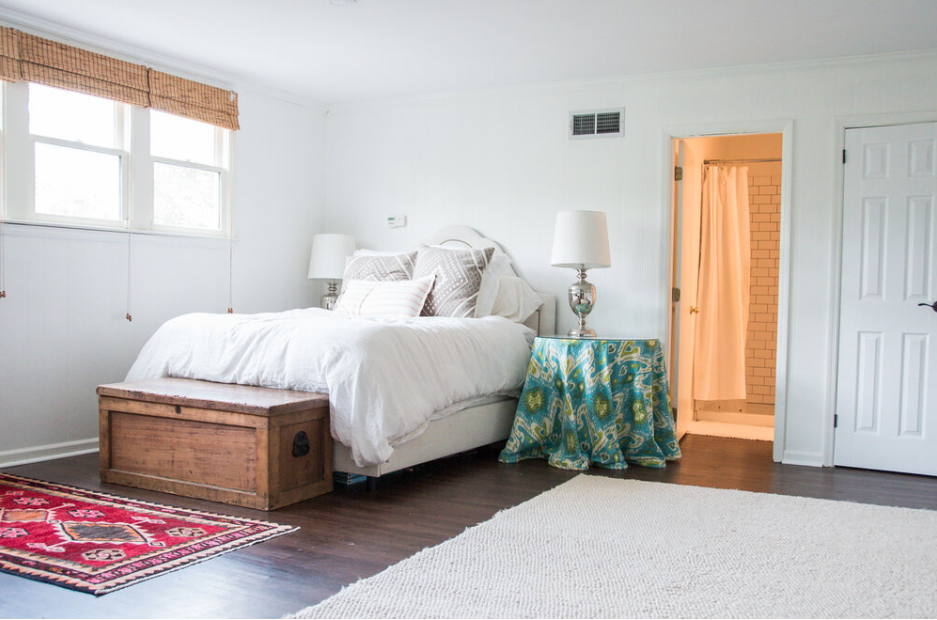
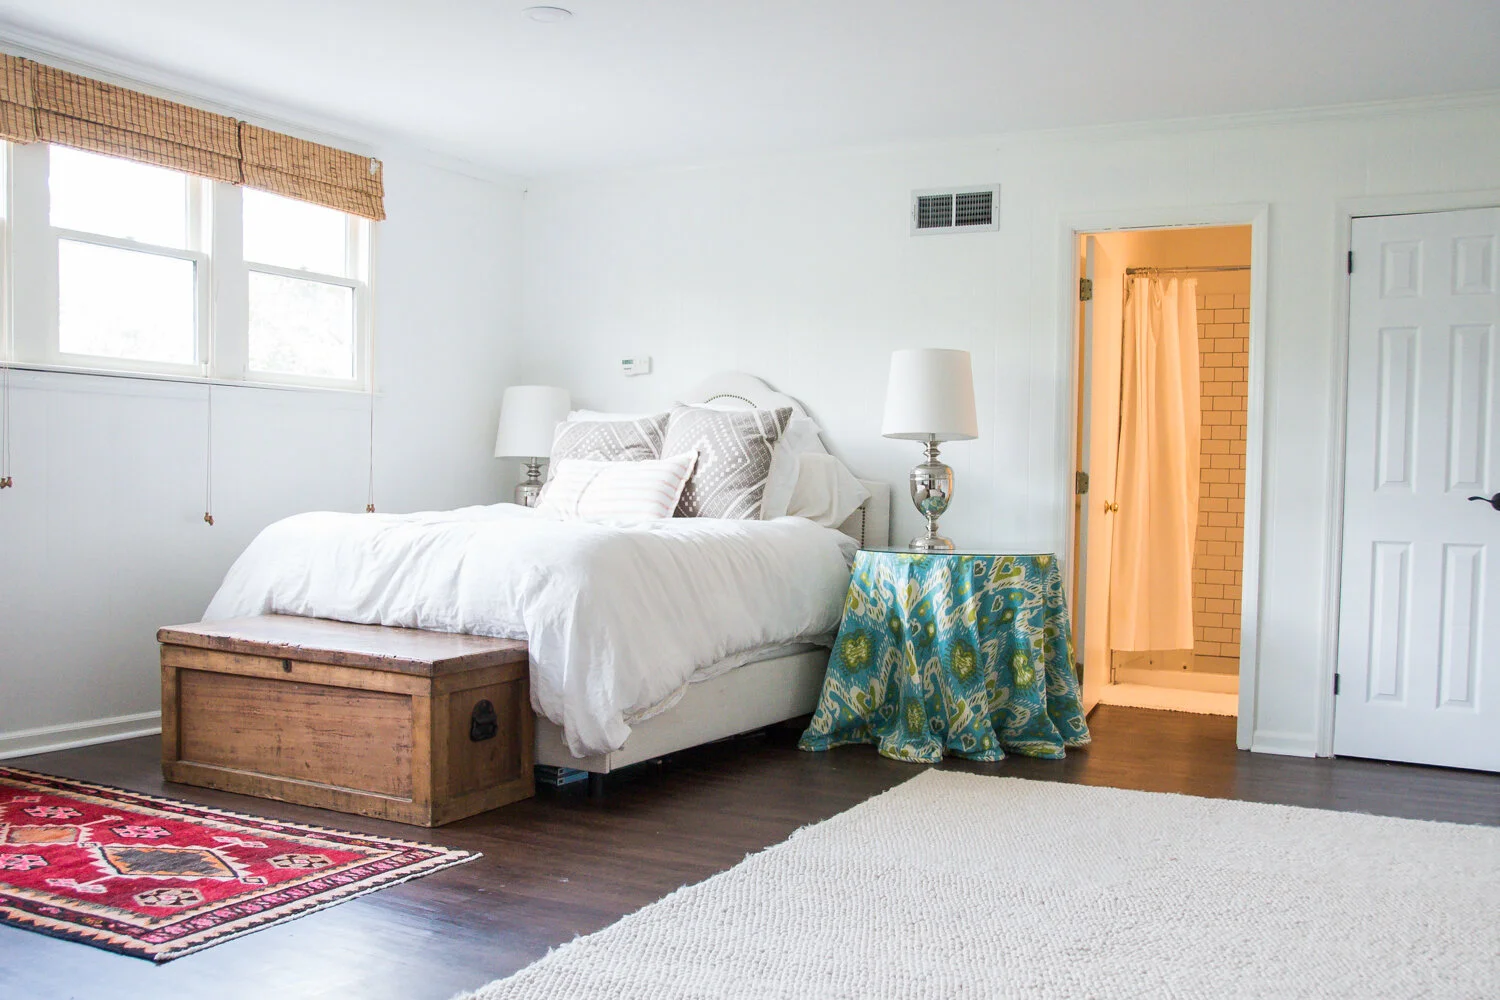
We’re fortunate in that our bonus room is quite large. We have 3 separate “areas” for each function. The most important thing to us was SPACE for the kids to run around.
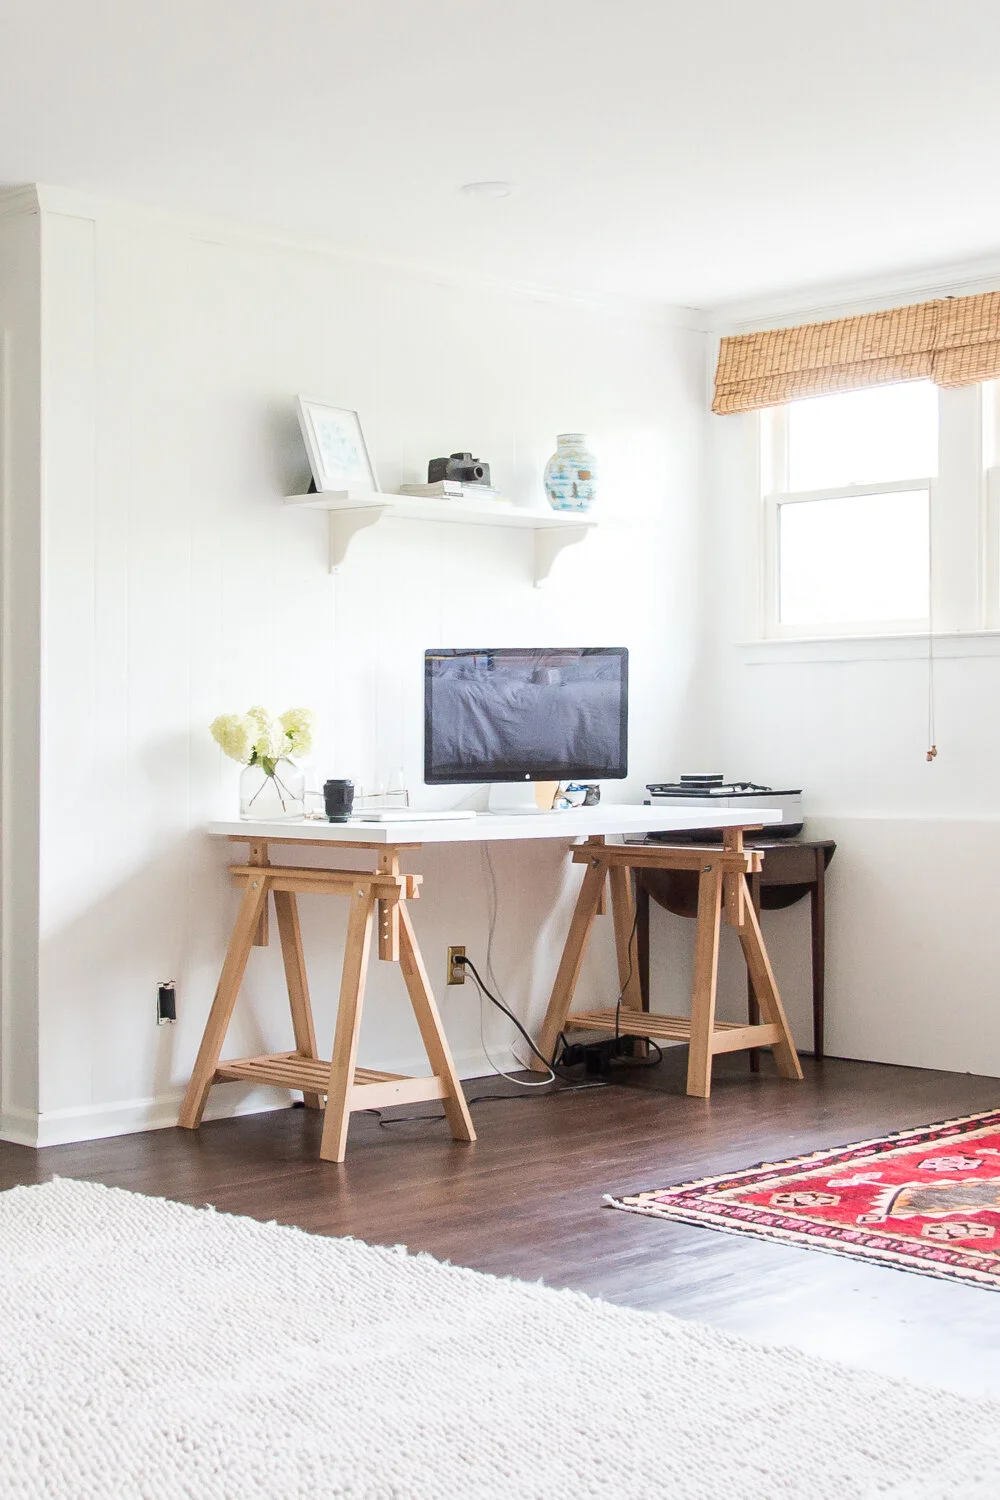
Still, though, we knew that my desk would need to be small and “away” from the main play area, and that the room still needed to be inviting to guests, and not feel like a hodge-podge of random furniture.
With that said, we were very intentional about where we put things and maximizing the space that we had.
We reserved the largest area of the room for the kids, put the bed furthest from the door (ideally, this would be a pull out sofa, but we already had a bed!), and put the desk out of the way.
4.) Stick to neutral decor
One of the most important parts, to me, of creating a polished multipurpose room is making sure that it looks cohesive and clean. Though it can be tempting to pick super colorful and “kid-centric” themes for play rooms, we chose neutral furnishings and wall colors paired with family photos and colorful, playful touches.
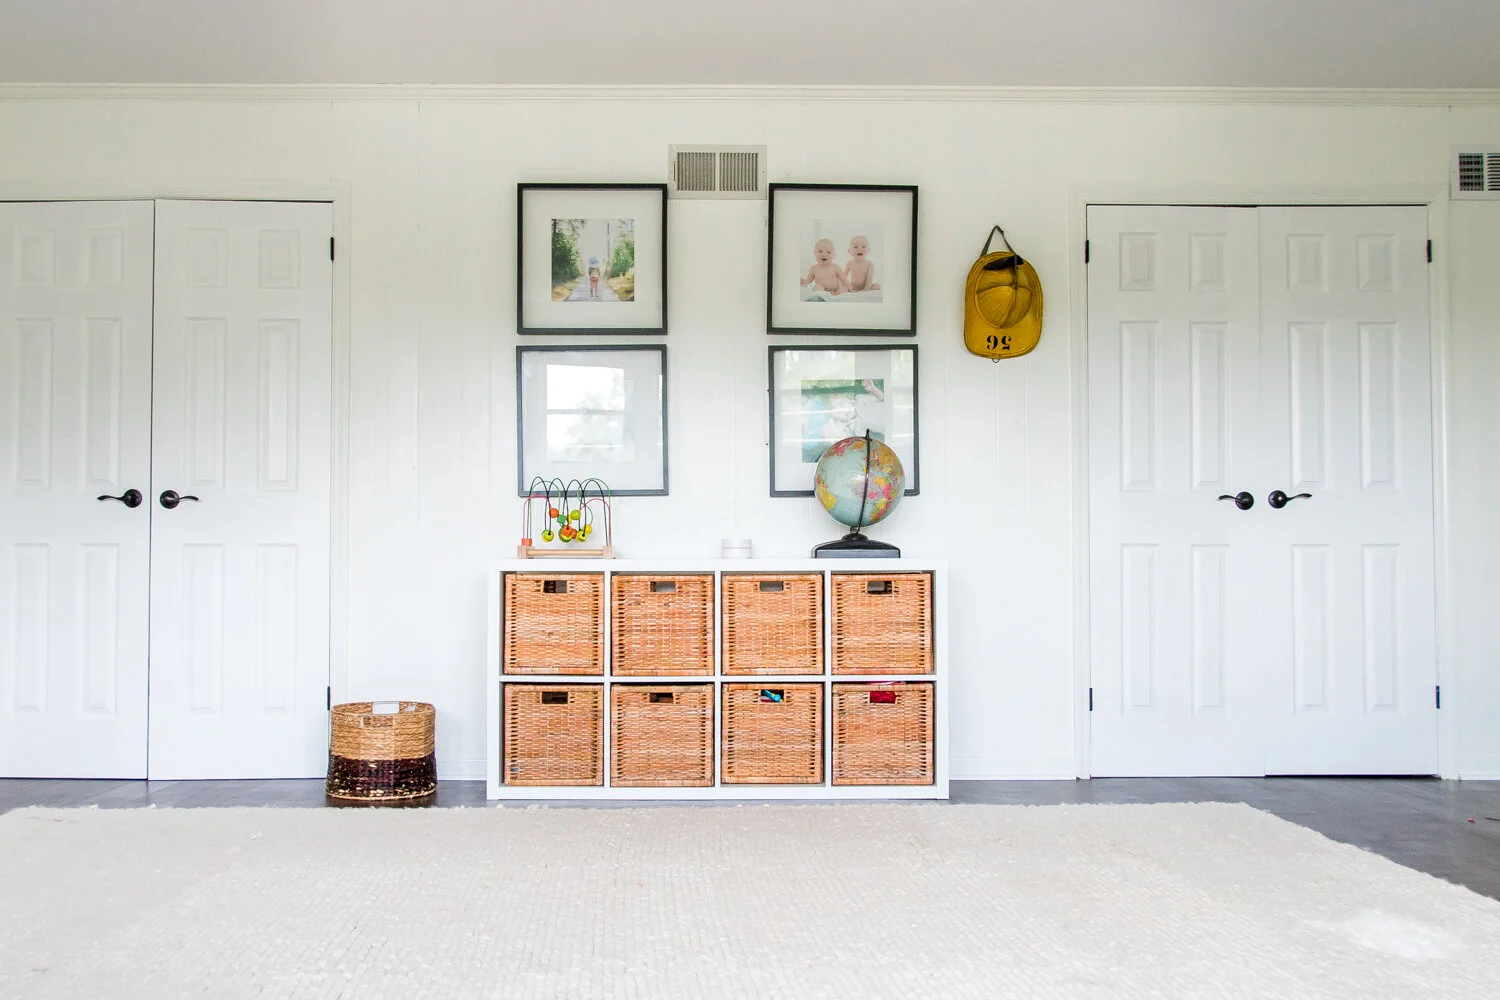
An old globe from childhood, my dad’s fireman helmet from the 70s, and large square photos soften the room and add a pop of color and personality.
We are big proponents of hidden toy storage, so the IKEA KALLAX unit in white with the BRANAS baskets was a great (and reasonably priced!) option for us.
These, paired with other grass baskets, store the kiddos’ most-used toys, while a dedicated closet in the room hides other big toys when guests are staying in the room.
A sturdy but bare-bones desk from IKEA with a floating shelf above it doesn’t take up too much space and serves its purpose well.
So there you have it! Our tips for planning, creating, and decorating a multipurpose room. What other tips do you have? Share them in the comments below!